
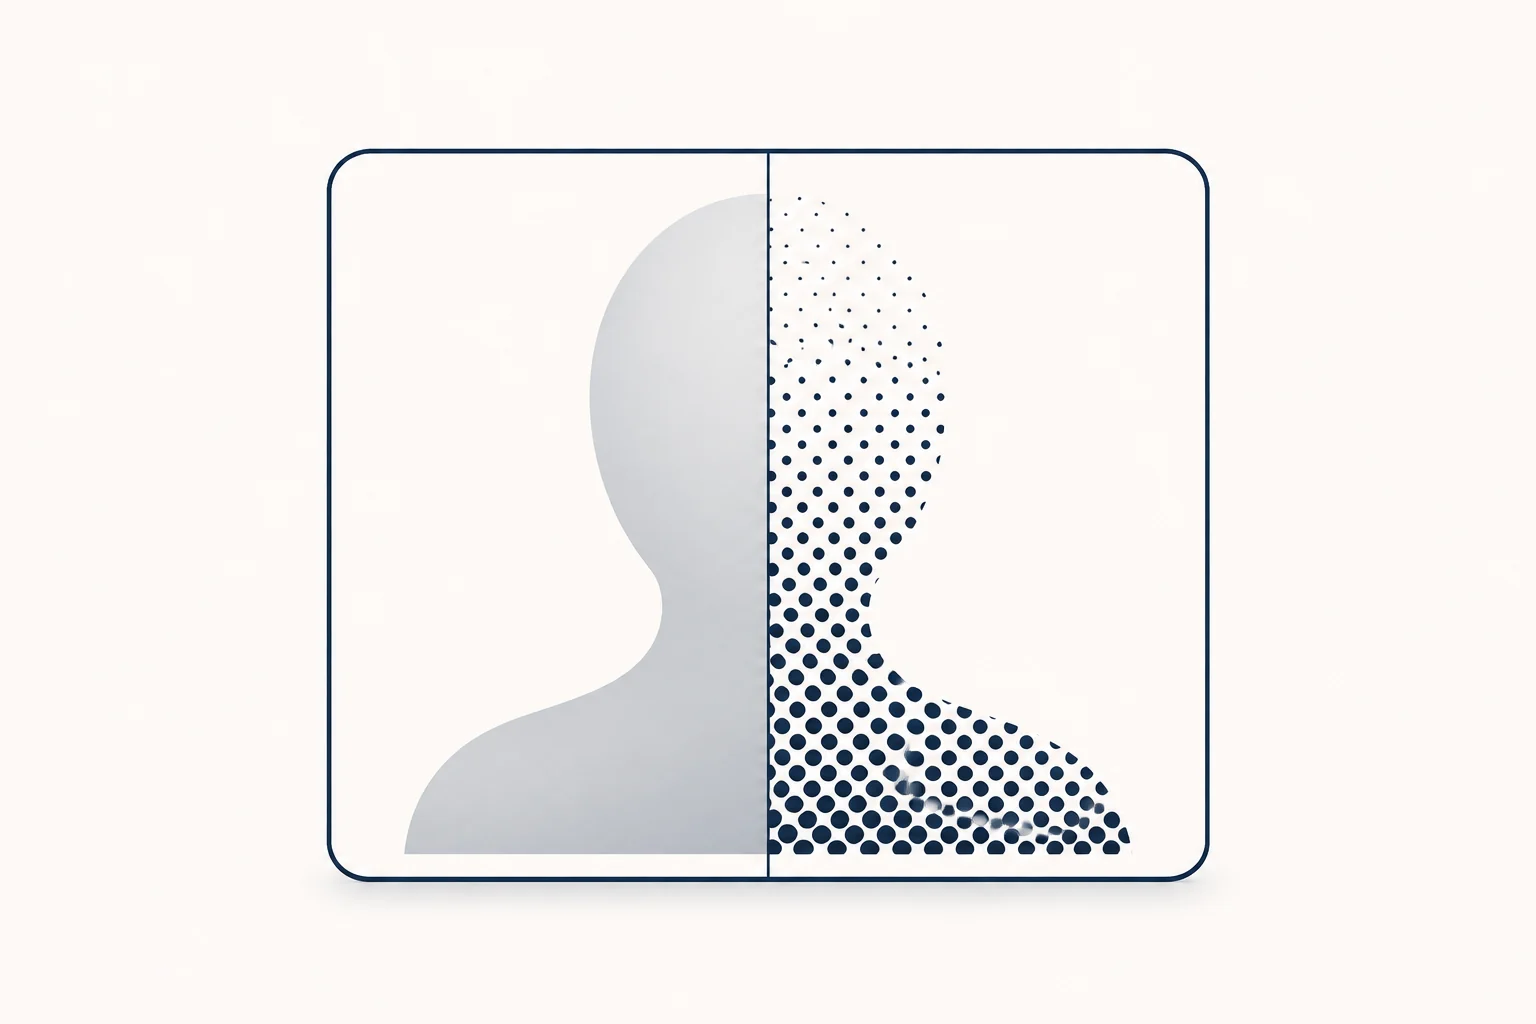
A halftone effect turns a photo's continuous tones into a grid of dots that grow in the shadows and shrink in the highlights. To make one, crop and convert the photo to grayscale, set its contrast, then run it through a halftone screen: Photoshop's Color Halftone, GIMP's Newsprint, Krita's Halftone filter, Figma's built-in Halftone shader effect, a few lines of CSS, a fragment shader, or a browser editor such as the HorizonX halftone effects. Which one fits depends on where the result goes: print, a design file or a live web page.
If you are still choosing between halftone, dithering and ASCII as a visual direction, read dithering vs halftone vs ASCII first. This guide assumes you have picked halftone and covers how to make it.
What was tested, on 2026-11-09: the CSS passed csstree-validator 4.0.1, the JavaScript passed node --check on Node 24, and the CSS and WebGL demos rendered in headless Chromium with no console errors. The tool instructions come from each vendor's documentation, linked next to each claim.
What a halftone is
A halftone screen divides the image into a grid of cells and puts one dot in each cell, sized to how dark the image is there. From a normal viewing distance the eye blends dots and paper back into tones. Four settings control the look:
- Cell size or frequency. In print, frequency is measured in lines per inch (lpi), the number of dot rows per inch, counted along the screen angle (Wikipedia, Halftone). Fewer lines mean bigger, more visible dots. On screen, think in pixels: the dot pitch is the distance between dot centres.
- Angle. The grid is usually rotated. Figma's documentation calls 45 degrees the classic print angle for a single ink (Figma help, checked 2026-11-09).
- Dot shape. Round is the default; lines, diamonds, squares and crossing lines give different textures.
- AM or FM. Classic halftone is amplitude-modulated (AM): dots sit on a regular grid and vary in size. Frequency-modulated (FM), or stochastic, screening keeps tiny dots the same size and varies how many there are, which looks much closer to dithering (Wikipedia, Halftone). The rest of this guide is about AM, the look most people mean by "halftone effect".
CMYK and rosettes. Colour print uses one screen per ink: cyan, magenta, yellow and black. Each screen sits at a different angle to reduce moiré, the interference pattern two overlapping grids make, and the standard angles form small circular patterns called rosettes (Wikipedia, Halftone). A one-ink halftone avoids rosettes and is easier to read; a CMYK one gives the comic or magazine look.
Prepare the photo first
The screen only translates tones. Most halftones that fail were failing before the filter ran.
- Crop tight. A halftone throws away fine detail, so the subject has to be large in the frame.
- Work at the final output size. Dots are measured in pixels. Resizing an image after screening resamples the dot grid and creates moiré, so set the final size first.
- Convert to grayscale for a one-ink look, or decide now that you want colour.
- Set a clean black and white point with Levels or Curves. Dots carry the midtones; muddy midtones become a flat field of same-sized dots.
- Soften slightly. A small blur removes JPEG noise and skin texture that would otherwise turn into random dots.
Photoshop: Color Halftone
Photoshop's filter reference lists Color Halftone under Filter > Pixelate (Adobe, Photoshop filter effects reference, checked 2026-11-09). Adobe documents its settings in the Photoshop Elements help (Adobe, Pixelate filters):
- Max. Radius sets the largest dot, from 4 to 127 pixels.
- Screen angles are set per channel, from -360 to 360 degrees.
- A grayscale image uses only channel 1. For colour images, channels 1 to 4 correspond to cyan, magenta, yellow and black.
For a single-ink look, convert the image to grayscale mode, run Color Halftone with channel 1 at 45 degrees and a radius that gives visible dots at your output size. For a colour look, keep the image in colour and give each of the four channels its own angle. The result is raster pixels at the document's resolution, so enlarge the document before running the filter if you need crisper dots.
GIMP Newsprint and Krita Halftone (free)
GIMP. In GIMP 3.0, the filter is at Filters > Distorts > Newsprint (GIMP documentation, checked 2026-11-09). The main settings:
- Color Model: White on Black, Black on White, RGB or CMYK.
- Pattern: Line, Circle, Diamond, PSSquare (Euclidean) or Crossing Lines.
- Period (cell size) and Angle for each channel.
- Black Pullout, in CMYK only, which controls how much of the dark tone goes to the black screen instead of the three colour screens.
The GIMP docs add two useful warnings. Newsprint is meant to simulate the look of halftone printing, not to generate the screens a printer needs. And if you print the result, set anti-aliasing to 1.
Krita. Krita's Halftone filter, in its artistic filters, has three modes: Intensity, Independent Channels and Alpha (Krita manual, checked 2026-11-09). Independent Channels screens each colour channel separately, which is the route to a colour halftone.
Figma: the built-in Halftone shader effect
Figma now ships a first-party Halftone shader effect, in open beta when checked on 2026-11-09. It is available on Starter, Professional, Education, Organization and Enterprise plans and needs edit access. You find it under Tools, with Source set to "From Figma" and the Shader effect filter (Figma help).
Its controls map neatly onto the theory above:
- Pattern: Dot or Blended.
- Dot Size and Dot Scale.
- Color Mode: CMYK (at print angles, with rosettes), RGB, BW Light or BW Dark.
- Rotation, where Figma notes that 45 degrees is the classic print angle.
- Center, Softness and Clip to Alpha.
There are also community plugins for halftone in Figma. Before you rely on one, check whether it outputs vector shapes or a raster image, because a screen printer or vinyl cutter needs vectors. Check its licence too.
A CSS halftone for UI
For decorative images and backgrounds in an interface, CSS can screen an image without JavaScript. Use it for imagery, not for text or controls, because the filter applies to everything inside the element.
<div class="halftone">
  <img src="/media/portrait.jpg" alt="Portrait of a woman laughing">
</div>

<div class="halftone-fade" role="presentation"></div>
.halftone {
  position: relative;
  display: inline-block;
  filter: grayscale(1) contrast(20);
}

.halftone img {
  display: block;
  width: 100%;
  height: auto;
}

.halftone::after {
  content: "";
  position: absolute;
  inset: 0;
  background: radial-gradient(circle, #000, #fff) 0 0 / 8px 8px;
  opacity: 0.5;
  pointer-events: none;
}

.halftone-fade {
  height: 240px;
  background:
    radial-gradient(circle, rgb(0 0 0 / 0.5), rgb(255 255 255 / 0.5)) 0 0 / 12px 12px,
    linear-gradient(to right, #000, #fff);
  filter: contrast(20);
}

.tinted { background: #ff5a36; }
.tinted .halftone-fade { mix-blend-mode: multiply; }
How it works:
- A radial gradient from black to white, tiled every 8 pixels, lies over the photo at 50% opacity. Each pixel becomes an average of the photo and the dot pattern.
contrast(20)in thefilterpushes every pixel to near black or near white around the mid-grey line. Where the photo is dark, more of each cell crosses the line, so the dot grows; where it is light, the dot shrinks to nothing..halftone-fadeuses the same trick on a gradient to make a halftone fade for backgrounds, with no image at all. In our render it ran the full range: solid black, then white holes, then black dots, then bare paper.- For coloured paper, put the fade inside a coloured parent and set
mix-blend-mode: multiply: white disappears and black stays as ink.
An earlier attempt used a grey-to-white pattern and multiply. Everything under 50% brightness came out solid black, which is why the version above averages the pattern in at 50% instead.
Limits: the grid is square, not rotated; dot edges are only as clean as the contrast step; and the effect is grayscale until you blend a colour back in. Keep the alt text on the image, since the dots carry no meaning of their own.
A halftone fragment shader
For images or video on a web page, or when you need a rotated screen with accurate dot sizes, a fragment shader does the job in one pass. This one draws dark ink dots on warm paper:
precision mediump float;

uniform sampler2D u_image;
uniform vec2 u_resolution;  // canvas size in device pixels
uniform float u_cell;       // dot pitch in device pixels, for example 8.0
uniform float u_angle;      // screen angle in radians, for example radians(45.0)

const vec3 PAPER = vec3(0.96, 0.94, 0.90);
const vec3 INK = vec3(0.10, 0.12, 0.18);

void main() {
  float s = sin(u_angle);
  float c = cos(u_angle);
  mat2 toScreen = mat2(c, -s, s, c);    // rotate into the tilted dot grid
  mat2 toCanvas = mat2(c, s, -s, c);    // and back

  vec2 p = toScreen * gl_FragCoord.xy;
  vec2 center = (floor(p / u_cell) + 0.5) * u_cell;

  // Read the image once per cell, at the cell's centre
  vec2 uv = (toCanvas * center) / u_resolution;
  uv.y = 1.0 - uv.y;
  vec3 rgb = texture2D(u_image, uv).rgb;
  float ink = 1.0 - dot(rgb, vec3(0.2126, 0.7152, 0.0722));

  // Dot area matches the ink coverage; past about 78% the dots touch
  float radius = u_cell * sqrt(ink / 3.14159);
  float d = distance(p, center);
  float dotMask = 1.0 - smoothstep(radius - 0.75, radius + 0.75, d);

  gl_FragColor = vec4(mix(PAPER, INK, dotMask), 1.0);
}
A small WebGL 1 setup that draws it once over an image:
const VERTEX = `
attribute vec2 a_position;
void main() {
  gl_Position = vec4(a_position, 0.0, 1.0);
}
`;

function compile(gl, type, source) {
  const shader = gl.createShader(type);
  gl.shaderSource(shader, source);
  gl.compileShader(shader);
  if (!gl.getShaderParameter(shader, gl.COMPILE_STATUS)) {
    throw new Error(gl.getShaderInfoLog(shader));
  }
  return shader;
}

// fragmentSource is the halftone shader above, as a string
export function drawHalftone(canvas, image, fragmentSource, { cell = 8, angle = 45 } = {}) {
  const gl = canvas.getContext("webgl");
  if (!gl) return false; // keep showing the original image

  const dpr = Math.min(window.devicePixelRatio || 1, 2);
  canvas.width = Math.round(canvas.clientWidth * dpr);
  canvas.height = Math.round(canvas.clientHeight * dpr);

  const program = gl.createProgram();
  gl.attachShader(program, compile(gl, gl.VERTEX_SHADER, VERTEX));
  gl.attachShader(program, compile(gl, gl.FRAGMENT_SHADER, fragmentSource));
  gl.linkProgram(program);
  if (!gl.getProgramParameter(program, gl.LINK_STATUS)) {
    throw new Error(gl.getProgramInfoLog(program));
  }
  gl.useProgram(program);

  // One triangle that covers the whole canvas
  gl.bindBuffer(gl.ARRAY_BUFFER, gl.createBuffer());
  gl.bufferData(gl.ARRAY_BUFFER, new Float32Array([-1, -1, 3, -1, -1, 3]), gl.STATIC_DRAW);
  const position = gl.getAttribLocation(program, "a_position");
  gl.enableVertexAttribArray(position);
  gl.vertexAttribPointer(position, 2, gl.FLOAT, false, 0, 0);

  // Non-power-of-two images need clamping and no mipmaps in WebGL 1
  gl.bindTexture(gl.TEXTURE_2D, gl.createTexture());
  gl.texParameteri(gl.TEXTURE_2D, gl.TEXTURE_WRAP_S, gl.CLAMP_TO_EDGE);
  gl.texParameteri(gl.TEXTURE_2D, gl.TEXTURE_WRAP_T, gl.CLAMP_TO_EDGE);
  gl.texParameteri(gl.TEXTURE_2D, gl.TEXTURE_MIN_FILTER, gl.LINEAR);
  gl.texParameteri(gl.TEXTURE_2D, gl.TEXTURE_MAG_FILTER, gl.LINEAR);
  gl.texImage2D(gl.TEXTURE_2D, 0, gl.RGBA, gl.RGBA, gl.UNSIGNED_BYTE, image);

  gl.uniform2f(gl.getUniformLocation(program, "u_resolution"), canvas.width, canvas.height);
  gl.uniform1f(gl.getUniformLocation(program, "u_cell"), cell * dpr);
  gl.uniform1f(gl.getUniformLocation(program, "u_angle"), (angle * Math.PI) / 180);
  gl.viewport(0, 0, canvas.width, canvas.height);
  gl.drawArrays(gl.TRIANGLES, 0, 3);
  return true;
}
Place the canvas on top of the <img> with absolute positioning and aria-hidden="true", so the image and its alt text stay in the page and show through if WebGL is missing. The image must be same-origin or served with CORS (MDN on CORS-enabled images), and the CLAMP_TO_EDGE setup is what WebGL 1 needs for images whose sides are not powers of two (MDN, Using textures in WebGL).
What the shader does:
- It rotates each pixel into the tilted grid, finds the centre of its cell and samples the image once there, so every dot gets one flat tone.
- It converts that colour to luminance with Rec. 709 weights and treats the darkness as ink coverage.
- It sets the radius so the dot's area equals that coverage. A plain linear radius would make midtones too dark.
smoothstepover 1.5 pixels anti-aliases the dot edge.
Two honest limits. Round dots start to touch at about 78.5% coverage, and the corners of each cell stay paper even in pure black, so the deepest shadows read as very dark rather than solid. And for video, upload the frame again on every animation frame and redraw (MDN, Animating textures in WebGL). For CMYK, run one screen per ink at different angles, with black at 45 degrees, and multiply the results.
Browser halftone editors
If you want to tune the look by eye on a real photo or clip and export a file, a browser editor is faster than code. The HorizonX halftone collection holds seven effects (checked 2026-11-09). The ones made for photos:
- Press Screen: coarse round dots on a fixed grid that swell in the shadows and shrink to nothing in the light. You set the dot pitch, gamma, foreground and background inks for a spot-colour look, soft focus and a colour mode (Mono, Multi, Original, Tinted, Luminous or Toned). It works on images and video.
- Halftone Field: keeps the picture visible under the dots. Around 68 columns gives visible print-style dots and lower values a bold poster screen; setting the photo background to 0 keeps only the dots. It adds paper grain and mono, duotone or original colour.
- Warm Press: a two-plate, riso-style print with block, round-dot, continuous or photo screens. If that is the direction, the guide to riso-inspired website graphics covers turning that look into a consistent image system for a site.
Stills export as PNG or JPEG and motion as MP4 or a PNG sequence. Anyone can open and adjust the effects; exporting is part of the paid plans, which start at $24.99 a month (checked 2026-11-09). These editors produce raster files, not print separations or vector dots, so they suit screen use, social posts and print simulation rather than a press-ready screen.
Print vs screen
For print:
- Ask the printer what screen ruling (lpi) and resolution they want. It depends on the press and the paper, so do not copy a number from a chart.
- Ask whether to send your own halftone or a continuous-tone file. If the printer screens an already-screened image again, the two grids can clash into moiré.
- Do not scan a printed photo and screen it again. Soften the scan first so the old dots disappear.
- In GIMP, set Newsprint's anti-aliasing to 1 for print, as its docs advise, and remember that it simulates the printed look.
- For screen printing or cutting, you need vector dots or a 1-bit image at the printer's resolution, not a soft-edged raster.
For screen:
- Export at the displayed size times the device pixel ratio, and do not let the browser resize the image; a resampled dot grid shows moiré.
- Use PNG for crisp dots. JPEG compression smears the hard edges and adds noise around each dot.
- Coarse screens survive small sizes and compression better. Very fine dots turn into flat grey in a thumbnail.
- For dark interfaces, invert the scheme: light dots on a dark ground (GIMP's White on Black model, or swap the ink and paper colours).
Keep faces readable
Faces are where halftones fail first, because the features that make a face recognisable are small.
- Count the cells across the features. In our shader test on a simple synthetic face, eyes 24 pixels wide on an 8-pixel pitch got about three cells each and nearly vanished. If the eyes are 3 cells wide, halve the pitch or crop tighter.
- Raise local contrast on eyes, brows and mouth before screening, rather than the whole image.
- Lift the midtones (gamma or Curves) so skin does not become a solid field of large dots.
- Soften skin texture slightly so pores and noise do not become random dots.
- Prefer one ink or a duotone on portraits. CMYK rosettes add coloured noise to skin tones.
- Judge at the final size. Step back or zoom out to the real display size; at 100% zoom every halftone looks like dots.
FAQ
What is the best halftone generator?
It depends on the output. GIMP and Krita are free desktop options; Photoshop's Color Halftone is the familiar one if you already pay for it; Figma's Halftone shader keeps the effect inside a design file; CSS or a shader keep it live in a web page; and a browser editor such as HorizonX Press Screen gives tunable stills and video exports on a paid plan.
What angle should a halftone screen be?
For a single ink, 45 degrees is the classic choice. For several inks, give each one a different angle. Figma's CMYK mode uses print angles for you, and Photoshop and GIMP let you set an angle per channel.
Can I make a halftone effect in CSS?
Yes. Lay a tiled radial-gradient dot pattern over a grayscale image at 50% opacity and apply filter: contrast(20) to the container, as in the snippet above. It suits decorative images and backgrounds, not text.
Can I apply a halftone to video?
Yes. HorizonX Press Screen accepts video, and the shader above works on a video texture if you upload and redraw each frame.
Next step
Prepare the photo first, then pick the tool that matches the output. To try a halftone on your own photo or clip and tune dot size, ink colours and contrast by eye, open Press Screen.